Imaging & Video Hardware
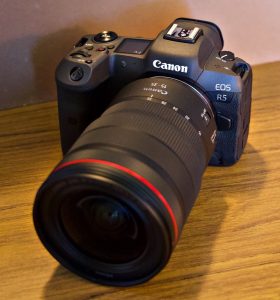
- Canon EOS R5 mirrorless camera & 128Gb high speed CFexpress card – a digital camera for both photos and video up to 8k of wildlife and action – my most-used camera
- Canon EOS R mirrorless camera & 128Gb high speed SDHC card – a digital camera for both photos and video up to 4k – a backup to my R5
- Hutech-modified Canon EOS Rebel T2i dSLR & 16Gb high speed SDHC card – astronomical photography
- Canon lenses
- Canon RF 24-105mm F4 L
- Canon RF 15-35mm f/2.8 L
- Canon RF 100-500mm F4.5-7.1 L
- Canon EF 8-15mm f/4 L Fisheye
- Canon RF 100mm f/2.8 L Macro
- Canon Extender RF 2x
- Canon GPS Receiver GP-E2 – geotags photos on the R and R5 cameras
- Apple iPhone 13 Pro – point-and-shoot photos and videos, up to 4k video
- GoPro Hero 12 Black – ruggedized wide-field digital camera – mainly used for underwater or on-the-water action photos and video
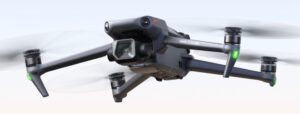
- DJI Mavic 3 Classic drone & Sandisk Extreme Pro 256Gb high speed SDXC card – HD, 2.7k, 4k & 5.4k aerial video and 20 Mpix photos
- DJI Mini 3 Pro drone & Samsung 128Gb EVO Pro high speed SDXC card – HD, 2.7k, 4k aerial video and 12/48 Mpix photos
- Canon VIXIA HF R500 camcorder & 16Gb SDHC card – HD video, 32x optical zoom
- Plustek OpticFilm 8200i slide/transparency scanner – 35mm slide and negative film high resolution scanner – up to 7,200 dpi, high dynamic range (3.6 Dmax), up to 48 bit output
- Canon ImageCLASS MFb32Cdw multi-function flatbed scanner & colour laser printer – documents and low quality photographic prints
- Fujitsu ScanSnap iX500 – double sided, auto feed scanner – rapid scanning of multiple documents and photographic prints
- Epson Perfection V600 Photo Color flatbed scanner – scans transparencies up to medium format, 6,400 x 9,600 dpi resolution, high dynamic range (3.4 Dmax), DIGITAL ICE dust/scratch removal & colour restoration, up to 48 bit output
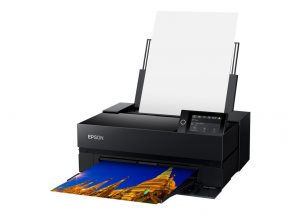
- Epson SureColor P900 17-Inch professional, high quality photo printer
- Manfrotto 055 PROB tripod with 488 RC2 ball head, 410 3-axis head (astronomy), 141 RC 3-axis head, 128 RC pan head (video)
- Manfrotto befree MKBFRA4-BH travel tripod with ball head and soft case
- Manfrotto 680B monopod
How I started with photography
When I was a kid, my parents and I took a bus tour through British Columbia. We saw Barkerville, the construction site of the Bennett hydro-electric dam in Northern BC, and the Canadian Rockies. I had a Grace 126 snapshot camera loaded with Kodachrome slide film, so I took a couple of dozen slides. The photography bug bit, and as of today, I have over 4,000 slides and negatives and well over 100,000 digital photos and videos.
My film-based camera gear (which I no longer use) includes two Minolta XD-11 35mm SLR camera bodies, various lenses from wide angle to zoom, a Vivitar 285 electronic flash, various filters and special effects devices, and a tripod. I used to shoot mostly colour slide film (Fujichrome 100 ASA), so I also have a good quality projection screen, as well as a Zeiss Pradolux RT-300 slide projector. This combo projects superb slideshows due to the precise Zeiss optics in the projector and the matte finish on the screen.
Conventional Darkroom
In the 1970’s and 1980’s I equipped myself with a decent darkroom, including an enlarger with a superb APO-Rodagon lens, and used Cibachrome positive-to-positive chemicals and papers for colour work and Ilford chemicals and papers for negative-to-positive black and white work. In the ensuing years, I did many colour enlargements of my slides using this setup, as well as some black and white work. In many ways, the black and white was much more enjoyable, since you can see what you are doing while the print develops in the trays before your eyes. Cibachrome (and the other colour processes) all require more of a cookbook approach to print development – consistency is the key.
In any case, I became quite proficient in darkroom work, and took good advantage of my formal darkroom training that I received from BCIT in the Photogrammetry lab. I have many enlargements hanging on my walls and in my files which are the result of this darkroom work, however once digital photography took over the market, I lost interest in conventional darkroom, so I sold my gear, and moved on…
Digital Darkroom
By 2000, I had transitioned to a digital darkroom. No fumes, nasty chemicals, or working in the dark! By this time, I was into second generation digital cameras, and had transitioned from Windows to Apple personal computers.
Image Processing & Storage
- Apple Mac Studio desktop computer with M2 Ultra 24C CPU, 60C GPU processors, 64 Gb Unified memory, 1 Tb SSD internal drive
- Apple MacBook Pro notebook computer with M3 Max 14C CPU, 30C GPU processors, 36 Gb Unified memory, 1 Tb SSD internal drive, 14″ Liquid Retina XDR display
- Apple 27″ Studio monitor – 5120×2880 resolution at 218 pixels per inch, 600 nits brightness, 1 billion colours, Wide colour (P3), True Tone technology – primary monitor for Mac Studio and secondary monitor for MacBook Pro
- Dell P2715Q 4k 27″ monitor – 3840×2160 resolution, 1 billion colours, 99% sRGB – secondary display for Mac Studio & MacBook Pro, mainly used for video or photo editing
- Storage
- 1Tb external Thunderbolt 4 SSDs – project-specific media processing
- OWC Mercury Elite Pro 20Tb RAID0 external dock Thunderbolt 3 with dual IronWolf 10Tb 7200 rpm NAS drives – archival media storage
- LaCie 8Tb 2big Dock RAID-0 external hard drive with Thunderbolt 3 and USB3 interface – archival media storage
- Multiple external USB 2/3 backup and archive drives
- DVD read/write Mac Superdrive
- Software
- ACDSee Photo Studio – media management and photo editing
- Affinity – photo editing, rapid processing of astronomical photos
- FinalCut Pro X – video editing
- VueScan – scanning software for all scanners
- ImagesPlus & PixInsight – processing astronomical photos
- TimeMachine – Apple backup/restore
- GoodSync – data archive replication
Photo printing
Up until 2021, I did casual colour printing using a Canon ImageCLASS MF632Cdw standard office colour laser printer. For any prints larger than standard office paper sizes, I used photo printing done by my local camera store’s lab service. The colour laser was fine to print cards and small prints as give-aways, but it is by no means a quality photo printer.
Since getting rid of my wet darkroom equipment, I rarely printed my photos. I prefer to view photos on high quality monitors and TVs, which to my eye render colours much more pleasingly than printing on paper.
That said, in early 2021 I decided to get back into serious photographic printing,. I acquired an Epson SureColor P900 large-format inkjet printer, which offers high print quality, ease-of-use, archival pigment inks, and supports a wide variety of paper. The 17-inch wide carriage gives flexibility for printing superb gallery quality large format prints, and fully supports roll paper (with optional adapter), so printing huge panoramas or other extra wide formats is easily done. In a way, this printer offers the capability I would have wished for in my previous wet darkroom, since at that time the maximum size I could print was 11″x14″ colour. The printer uses 10 high-capacity ink cartridges, giving superb gradation with both colour or black and white prints.
Digital Photography – the start
I purchased a Microtek ScanMaker 35t Plus slide scanner in late 1996. My first choice was to purchase a digital camera, however the market (at the time) was still developing new technology for these devices. I therefore decided to continue to use my 35mm film camera setup, and scan slides and negatives where needed. A digital camera which delivered equivalent quality to my slide scanner cost tens of thousands of dollars at the time, so I waited for the market to catch up to my demands. In the interim, I developed my skills in working with (scanned) digital photos on my computer system using this setup.
Early digital cameras
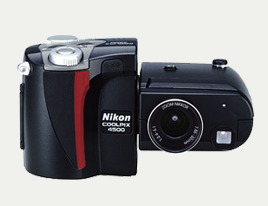
I finally decided to take the plunge and purchased a first generation digital camera in October of 1998 – a Sound Vision SVmini-209. I had so much fun with this (fairly limited) digital camera, that in July of 1999 I purchased a much more capable second generation digital camera – the Nikon Coolpix 950. My 950 became my workhorse camera, traveling with me everywhere.
I loved the folded design and ended up taking over 3,000 photos with this camera between 1999 and 2002. In 2002 I decided to upgrade to another digital camera from Nikon, the Coolpix 4500. The 4500’s systems were completely redesigned by Nikon, and offered me some features I could make use of for my interest in Astronomy and astrophotography.
The Nikon 950 was a best-rated 2 mega-pixel digital camera with a 3x optical zoom, and the Nikon 4500 was a best-rated 4 megapixel digital camera with a 4x optical zoom.
On a trip to Vancouver in 1999 I took some dramatic shots of the cityscape using the Nikon Coolpix 950. I used a Tiffen Circular Polarizer filter. The deep blue skies, luxuriant green foliage, and lack of spectral reflections off the glass and metal enhances the look of the images by increasing the colour saturation.
At the time I purchased the Coolpix 950, I thought it was time to retire my two Minolta XD-11 35mm SLR film-based cameras. Virtually all the photos I took since getting the two Nikon Coolpix cameras have been digital photos, so it appeared the trend was set. The Nikon Coolpix cameras opened up my creative side, since they were such capable digital camera systems. It was so liberating to not have to worry about film. Images load directly onto my computer’s hard drives from the digital camera. This feature become very attractive to me, and being able to post images to my website the very same day that they were taken was an intangible benefit of digital photography I hadn’t fully appreciated previously.
Nikon Coolpix 4500 digital camera built on my experience with the older 950. I found several features in the 4500 that lent themselves to astrophotography:
- noise reduction (aka dark frame). This was one of the first consumer digital cameras with this feature.
- CCD sensitivity can be set to a choice of ISO 100, 200, 400 or 800.
- long exposures of up to 5 minutes.
After performing some Dark Frame Tests using the 4500, I realized this camera was indeed very useful for astrophotography. Of course, it is was also a very capable camera for normal photography as well. The Nikon Coolpix 4500 was a very nice point-and-shoot digital camera, with many improvements over the design of its predecessors, the 950 and 4500. I took this camera with me when small size was required, or when I just wanted to take some snapshots. This camera’s design didn’t lend itself to astrophotography, however by this time I had that covered with my other Imaging Hardware.
Digital SLRs & mirrorless
The Canon EOS 300D Digital Rebel digital camera was my first Canon camera, purchased in late 2003. It came highly recommended by astrophotographers around the world, since Canon used the best low noise CMOS sensor available for this camera and its bigger brother the 10D. I also used this camera for normal terrestrial use. Having used point-and-shoot digital cameras for the previous few years, I hadn’t realized how much I missed using an SLR. They have fewer limitations and design compromises as compared with point-and-shoot cameras, providing the photographer with so much more flexibility and ease of use.
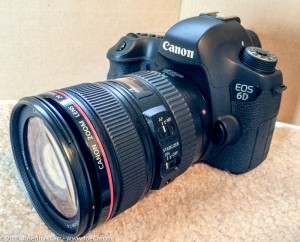
I ultimately sold my Digital Rebel, but I have purchased several Canon digital SLRs over the ensuing years (30D, 7D, 50D, 6D). They have been amazing cameras, producing excellent conventional and astronomical photographs. I take thousands of photos each year using my cameras. My last dSLR was the Canon 6D, which was also my first full-frame digital SLR.
Examples of my photography can be found in my JoeTourist photo galleries.
In 2018, it became obvious to me that Canon was falling behind the emerging mirrorless camera market (Nikon too, but I don’t use that brand). Mirrorless cameras discard the Single Lens Reflex design in favour of a more modern, simpler, and elegant design for digital cameras that still uses interchangeable lenses. Sony led the way with mirrorless cameras, with Panasonic and Fujifilm also in the game. Oddly, both Nikon and Canon ignored this market until 2018, when they brought out full-featured mirrorless models and new mounts to go with them, however their highly-touted debut models missed the mark badly. Canon to Ignore EF Lenses in 2019
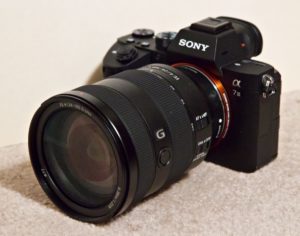
I decided it was time to get in the game, so I purchased a Sony a7 III mirrorless camera along with a Sigma MC-11 adapter so I could use my existing high quality Canon lenses on the Sony mirrorless. I also acquired a Sony FE 24-105mm f/4 G zoom and FE 70-300mm F4.5-5.6 G OSS, replacing my most-used Canon zoom lenses.
It took me a year, but I finally warmed up to Canon’s EOS R mirrorless camera once I saw the superb new RF lenses they were creating for their mirrorless line. So in late 2019 I acquired an EOS R, and shortly after in early 2020 I added the Canon RF 24-105mm f/4 and RF 15-35mm f/2.8 zooms to use as everyday lenses. I still use Canon’s EF 8-15mm f/4L fisheye zoom with the EF-RF adapter.
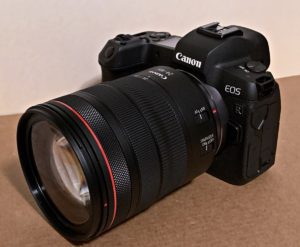
Although the Sony a7 III mirrorless system I assembled was working well for me, in 2020 I decided to trade everything in and concentrate on Canon mirrorless gear. I prefer the colour qualities from Canon, the EOS R menu system is easier to navigate than the a7 III, and I find the cropped 4k video from the EOS R 30 mpix sensor is not an issue for me.
Over the next three years, I acquired the Canon RF 100-500mm F4.5-7.1 L telephoto zoom, Canon RF 15-35mm f/2.8 L wide angle zoom, and Canon RF 100mm f/2.8 L Macro – a superb choice for any closeup work. In addition to the standard Canon RF 24-105mm F4 L zoom, this covers most my needs. I retained my previous Canon EF 8-15mm f/4 L Fisheye for specialized super wide angle work. In 2021 I acquired the high-end Canon EOS R5 mirrorless, which offers an amazing set of advanced features, as well as a 45 mpix sensor.
Astrophotography
In 2007, I purchased a Canon XTi which was specially modified by Hutech Corporation in California to be more sensitive to the infrared spectrum, which enhances emission nebulae with my work in astrophotography. After a few years, I replaced this camera with another modified Canon from Hutech: the T2i. This camera has some significant improvements for taking astronomy photos, including much lower noise from the sensor, and a live view screen on the back of the camera (critical for achieving good focus on stars).
Canon dSLRs are one of my main imaging sources for my Astrophotographs. Please refer to Imaging Hardware for details about how I acquire my astronomy images.
Transparency scanning
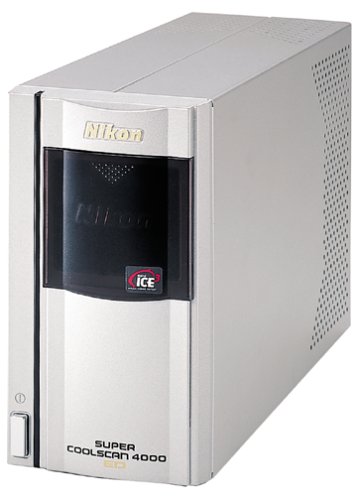
Despite being firmly in the digital imaging camp, I still have thousands of slides and negatives I want to digitize. I originally used the Microtek ScanMaker 35t+ film scanner, but it had a rather limited resolution and dynamic range, so in 2002 I replaced it with the much more capable Nikon Super Coolscan 4000ED transparency scanner, and quickly found new uses for my existing archive of film images.
- Dynamic Range of 4.2 – means this scanner “sees” more of the subtle detail to be found in the film emulsion. This is especially apparent in deep shadows and highlights. The 14-bit A/D conversion input and 16-bit output is a primary reason for this achievement, although obviously the lenses used, the LED lighting, and other scanner subsystems all contribute to a superb result.
- 4,000 dpi maximum resolution – I make use of this resolution for astronomical photos, but really don’t need this high resolution for photos of regular subject matter. I purchased the scanner based on its Dynamic Range more than the high resolution.
- Digital ICE3™ (cubed) – software technology (developed by Applied Science Fiction Inc.), which improves the final results of film scans in three ways:
- Digital ICE™ (Image Correction & Enhancement) – this feature is simply awesome, and is almost worth the premium price for this scanner all by itself. Using an infrared scan built into the scanner hardware, this software detects any “dirt” (dust, scratches, fingerprints, etc.) in the film being scanned, then masks them out of the final image scan. This feature saves hours and hours of hand spotting scanned images, or running complicated filters over images that are not always successful.
- Digital ROC™ (Reconstruction of Colour) – again, quite amazing what this technology can do to restore faded colours from old film, or correcting strange hues caused by underwater photography or processing chemical stains.
- Digital GEM™ (Grain Equalization & Management) – I haven’t made use of this technology very much, but at high resolution scans, Digital GEM will “smooth” the results, since individual grains of film are apparent at high resolutions.
- SCANNER NIKKOR ED high-resolution/high-performance lens – Nikon has a well-deserved reputation for producing some of the best lenses for their cameras as well as their scanners. This 7 element lens is specially-optimized for high resolution scanning, and is key to the success of this scanner in dealing with images other scanners simply can’t handle.
- Scanning speed throughput – when scanning at these high resolutions, it can take some scanners five minutes or more to deliver an image to the computer. Nikon’s claim that this scanner will scan a full frame 35mm film in 38 seconds is very close to what I am achieving.
- Firewire Interface – At the time (2002), this interface to the computer was the fastest technology around, and is considerably faster than either SCSI or USB, both of which are used by other scanner manufacturers. The 4000ED came with a Firewire (IEEE1394) adapter card (for PCs) and cable right in the box. Since I’m now using an iMac, I connect to the scanner with two converters: a Firewire to Thunderbolt 2 cable and a Thunderbolt 2 to 3 cable, both supplied by Apple.
- Software – although I originally used the Nikon Scan software, sadly Nikon subsequently abandoned support for both their transparency scanners and the supporting software. Thankfully, this scanner is still fully supported by VueScan scanning software.
The Plustek OpticFilm 8200i slide/transparency scanner has replaced my Nikon Super Coolscan 4000ED transparency scanner for scanning 35mm slides and negatives. I found the Nikon scanner became unreliable, and I was unable to troubleshoot the problem, so it was time to move on. The Plustek is a high resolution scanner (up to 7,200 dpi) with a high dynamic range (3.6), up to 48 bit output, and supports dust and scratch removal with its infrared sensor.
After discovering a shoebox with hundreds of film negatives of family events from the 1930-1950 era, I was looking for a transparency scanner that could handle medium format negatives. The choices were few by 2022, however the Epson Perfection V600 Photo Color flatbed scanner was still available, and was reasonably priced, so I purchased one from a local dealer. This scanner handles transparencies up to medium format, scanning at up to 6,400 x 9,600 dpi resolution, has a high dynamic range (3.4 Dmax), DIGITAL ICE dust/scratch removal & colour restoration, and outputs raw files up to 48 bit colour depth. It has enabled me to scan some of those treasures from so long ago.
DJI Drones
A significant addition to my photographic kit happened in the summer of 2017 when I acquired a drone. The DJI Mavic Pro shoots amazing 4k, 2.7k and HD video as well as excellent high resolution 12 Mpix photographs. Having a camera in the air gives me a whole new set of possibilities to capture new perspectives. In 2019 I qualified for a Transport Canada drone Pilot Certificate, so I am free to fly my drones within Canada, subject to rules and regulations.
In 2020 I acquired a second drone: the DJI Mavic Air 2, which greatly improves on the features of my Mavic Pro, and shoots 4k video in 60 fps, whereas my Mavic Pro is limited to 30 fps for 4k. The Mavic Air 2 is lighter, a bit smaller and costs less than the Mavic Pro did, however it flies further and has a bit more time in the air on a battery. I sold both of these drones to keep up with the latest technological advances.
The DJI Mavic 3 Classic is a big drone with lots of capabilities, including using a Hasselblad 20 MPix sensor. The image quality from this camera is top notch, and the increased sensor size delivers photographs that I am fully satisfied with. Due to it’s weight, the Mavic 3 Classic must be flown under more restrictive flight rules in Canada (and other countries), so I also fly a second drone in the under 250 gram weight class. The DJI Mini 3 Pro is such a light weight drone that is still fully capable with a nice 12 MPix sensor, and I can fly it virtually anywhere I wish in Canada and elsewhere in the world. Having a camera in the air is indispensable for gaining new perspectives, especially when it comes to landscape photography.


